

update
form 요소가 있는 CreateContent를 복사해서 UpdateContent로 만들어준다.
article이 mode에 따라 바뀌는 부분이 길어서 코드가 지저분해 보이기 때문에 render밖으로 getContent라는 함수로 만들어준다.
getContent(){
    let _title, _desc, _article = null;
    if(this.state.mode === 'welcome'){
      ...
      }

      _article = <ReadContent title={_title} desc={_desc}></ReadContent>
    } else if(this.state.mode === 'create'){
      ...
      }.bind(this)}></CreateContent>
    } else if(this.state.mode === 'update'){
     ...
      }.bind(this)}></UpdateContent>
    }

    return _article;
}그리고 _article을 리턴해주도록 한다.
기존의 {_article}로 불러오던 콘텐츠 부분을
{this.getContent()}로 함수를 통해 불러주도록 한다.
이제 update를 누르면 해당하는 id 값을 가진 콘텐츠를 updateContent에 주입시켜줄 것이다.
그러려면 selected_content_id 값을 가져와야 하는데 이 값을 가져오는 과정은 이전에 read에서 작성해두었다. 따라서 이 코드를 활용하기 위해 getReadContent 함수로 만들어준다.
getReadContent(){
    let i = 0;
      while(i < this.state.contents.length){
        let data = this.state.contents[i];
        if(data.id === this.state.selected_content_id){
          return data;
          break;
        }
        i = i + 1;
      }
  }


 ...
 else if(this.state.mode === 'read'){
      let _contents = this.getReadContent();
      _article = <ReadContent title={_contents.title} desc={_contents.desc}></ReadContent>
      }

 else if(this.state.mode === 'update'){
      let _contents = this.getReadContent();
_article = <UpdateContent data={_contents} ....}이렇게 수정해준다.
update부분에서 _contents값을 받아와서 UpdateContent의 data속성으로 넣어주면 UpdateContent 컴포넌트에서 정상적으로 받아올 수 있다.
이제 해당하는 id 값의 내용을 form에 띄우도록 할 것이다.
UpdataContent에서
<p>
    <input
     type="text"
     name="title"
     placeholder="title"
     value={this.props.data.title}
     ></input>
</p>이렇게 value 값을 설정하면
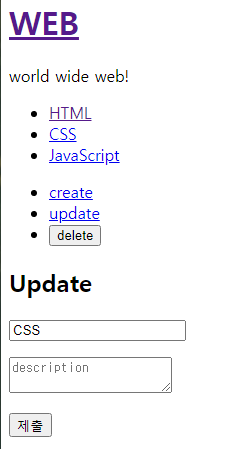
css 를 누르고 update를 눌렀을 때 title 부분에 CSS라는 제목이 들어와 있는 것을 볼 수 있다.

하지만 이러한 오류가 뜨는데 props로 받아온 값을 onChange 핸들러를 사용하지 않으면 수정할 수 없는 readonly가 된다는 것이다. 이러한 오류처럼 수정하려고 해도 수정되지 않는다.
그래서 이 값을 수정가능한 가변적인 데이터, state로 바꿔줄 것이다.
constructor(props){
      super(props);
      this.state = {
        title:this.props.data.title
      }
    }


 <p>
   <input
   type="text"
   name="title"
   placeholder="title"
   value={this.state.title}
   ></input>
</p>이렇게 constructor를 설정하고 props부분을 state로 바꾸어도 아직 수정은 되지 않는다. 우리가 이걸 state로 설정했다고 해서 state가 바뀔 근거가 없기 때문. state 값이 바뀐다 해도 state와 input 사이의 연결이 끊긴 거라고 볼 수 있다. 즉 컨트롤되고 있지 않은 것이다.
이제 input의 값이 바뀌었을 때 state의 값이 바뀌도록 해야 한다.
value={this.state.title}
onChange={function(e){
  this.setState({title: e.target.value});
}.bind(this)}이렇게 onChange 에 함수를 할당하면 이제 글의 수정이 가능하다!
desc부분도 처리하면 완료!
constructor(props){
      super(props);
      this.state = {
        title:this.props.data.title,
        desc:this.props.data.desc
      }
    }
...
<textarea
  name="desc"
  placeholder="description"
  value={this.state.desc}
  onChange={function(e){
    this.setState({desc: e.target.value});
  }.bind(this)}
></textarea>이제 제목과 내용 모두 수정이 가능하다. 하지만 이렇게 onChange를 하나씩 사용하는 것은 귀찮은 일! inputFormHandler라는 함수를 만들어서 반복을 피해주자.
inputFormHandler(e){
      this.setState({[e.target.name]: e.target.value});
    }

    ..
<p>
    <input
    type="text"
    name="title"
    placeholder="title"
    value={this.state.title}
    onChange={this.inputFormHandler.bind(this)}
    ></input>
    </p>
<p>
    <textarea
    name="desc"
    placeholder="description"
    value={this.state.desc}
    onChange={this.inputFormHandler.bind(this)}
    ></textarea>
</p>이렇게 사용해주면 코드가 훨씬 깔끔해진다!
[] 대괄호를 사용하는 것은 자바스크립트의 문법. e의 target의 name 값을 가져올 수 있다.
bind를 쓰는 것에서 반복이 생기니깐 이를 없애려면
constructor(props){
      super(props);
      this.state = {
        title:this.props.data.title,
        desc:this.props.data.desc
      }

      this.inputFormHandler = this.inputFormHandler.bind(this);
}constructor에서 bind가 포함된 형태로 저장해 두고 쓸 때는 bind를 생략하면 된다.
글을 수정할 때 어떤 글을 수정하는 지에 대한 식별자가 필요하다. 이 때 존재하지만 보이지 않는 type='hidden'의 input을 사용한다.
//UpdataContent.js

super(props);
      this.state = {
        id:this.props.data.id,
        title:this.props.data.title,
        desc:this.props.data.desc
      }
      ...
   <form action="/create_process" method="post"
      onSubmit={function(e){
        e.preventDefault();
        this.props.onSubmit(
          this.state.id,
          this.state.title,
          this.state.desc
        );
      }.bind(this)}
      >
//App.js
else if(this.state.mode === 'update'){
      let _contents = this.getReadContent();
      _article = <UpdateContent data={_contents} onSubmit={
        function(_id, _title, _desc){
        _contents = Array.from(this.state.contents); //원본 배열이 아닌 복사된 배열을 수정
        let i = 0;
        while(i<_contents.length){
          if(_contents[i].id === _id){
            _contents[i] = {id: _id, title:_title, desc:_desc};
            break;
          }
          i = i + 1;
        }
        this.setState({
          contents:_contents
        })
      }.bind(this)}></UpdateContent>
Array.from()
: 괄호 내의 배열을 복사해서 새로운 배열이 만들어진다.
원본 배열을 복사한 후 그 배열을 수정할 것이다.
받아온 id 값과 id 값이 같은 contents의 내용을 변경한다.
이제 수정을 하고 그 수정된 페이지를 보여주도록 하려면 mode를 read로 바꾸면 된다.
Delete
Control 컴포넌트에서 값을 받아올 때 mode가 delete이면 삭제 기능을 하면 되고 그렇지 않으면 mode만 바꿔주면 된다.
<Control onChangeMode={function(_mode){
          if(_mode === 'delete'){

          }else{
            this.setState({
              mode:_mode
            });
          }
}.bind(this)}></Control>이제 delete를 눌렀을 때 작동할 내용을 작성해주면 된다. 먼저 사용자에게 정말 삭제할 것인지 물어보는 것.
이 것은 window.confirm()을 사용할 것이다. confirm은 사용자가 확인을 누르면 true가 되고 cancel을 누르면 false가 된다.
<Control onChangeMode={function(_mode){
   if(_mode === 'delete'){    //만약 모드가 delete이면
     if(window.confirm('really?')){    //진짜로 지울건지 사용자에게 물어보고
       let _contents = Array.from(this.state.contents);   //원본 배열을 복제
       let i = 0;
       while(i < _contents.length){
         if(_contents[i].id === this.state.selected_content_id){  //클릭된 contents의 값과 id 값이 같다면
           _contents.splice(i, 1); //해당 i부터 1개를 지운다.
           break;
         }
         i++;
       }
       this.setState({
         mode:'welcome',   //모드를 welcome으로 바꾸고
         contents:_contents   //contents를 수정된 _contents로 바꾼다.
       });
       alert('deleted!');  //삭제한 후 삭제되었다고 알림을 띄운다.
     }
++리액트 활용
react router
리액트는 하나의 url로 모든 페이지를 다루고 있다. 페이지를 전환할 때마다 네트워크 로딩을 하지 않는다는 것을 장점이지만 url로 원하는 페이지에 접근하기는 어렵다. 이때 우리를 도와줄 수 있는 것이 REACT ROUTER이다. url에 따라 적당한 컴포넌트를 실행해서 url로 접근하는 사용자에게는 url에 맞는 ui를 서비스하는 것
redux
리액트의 컴포넌트가 많아질수록 컴포넌트 간의 접근이 까다로워진다. 이러한 단점을 보완하는 것이 리덕스이다. 리덕스는 중앙에 데이터 저장소를 두고 모든 컴포넌트는 중앙의 데이터 저장소와 직접 연결된다. 그래서 저장된 데이터가 변경되면 그에 연결된 모든 컴포넌트가 영향을 받아서 변화를 하게 된다.
react native
리액트와 같은 방법으로 native 앱을 만들 수 있다. native 앱이란 ios, 안드로이드와 같은 플랫폼을 이야기 한다.
'개발 공부 > React' 카테고리의 다른 글
| React #8 [json, 리액트 라우터] (0) | 2022.08.26 |
|---|---|
| React #7 [컴포넌트, CSS, 이벤트, state, props] (0) | 2022.08.23 |
| React #5 [props와 state, create, push와 concat] (0) | 2022.07.16 |
| React #4 [event 만들기, bind, setState] (0) | 2022.07.13 |
| React #3 [component 만들기,React Developer Tools, props, state, key] (0) | 2022.07.13 |